Spinning cakes are a formidable way to impress your guests with something that's beautiful and fun at the same time. Just imagine how cool it is to have a cake you can interact with and reconfigure so you can get up to 16 different cakes -or 64 different sides- with just a few spins.

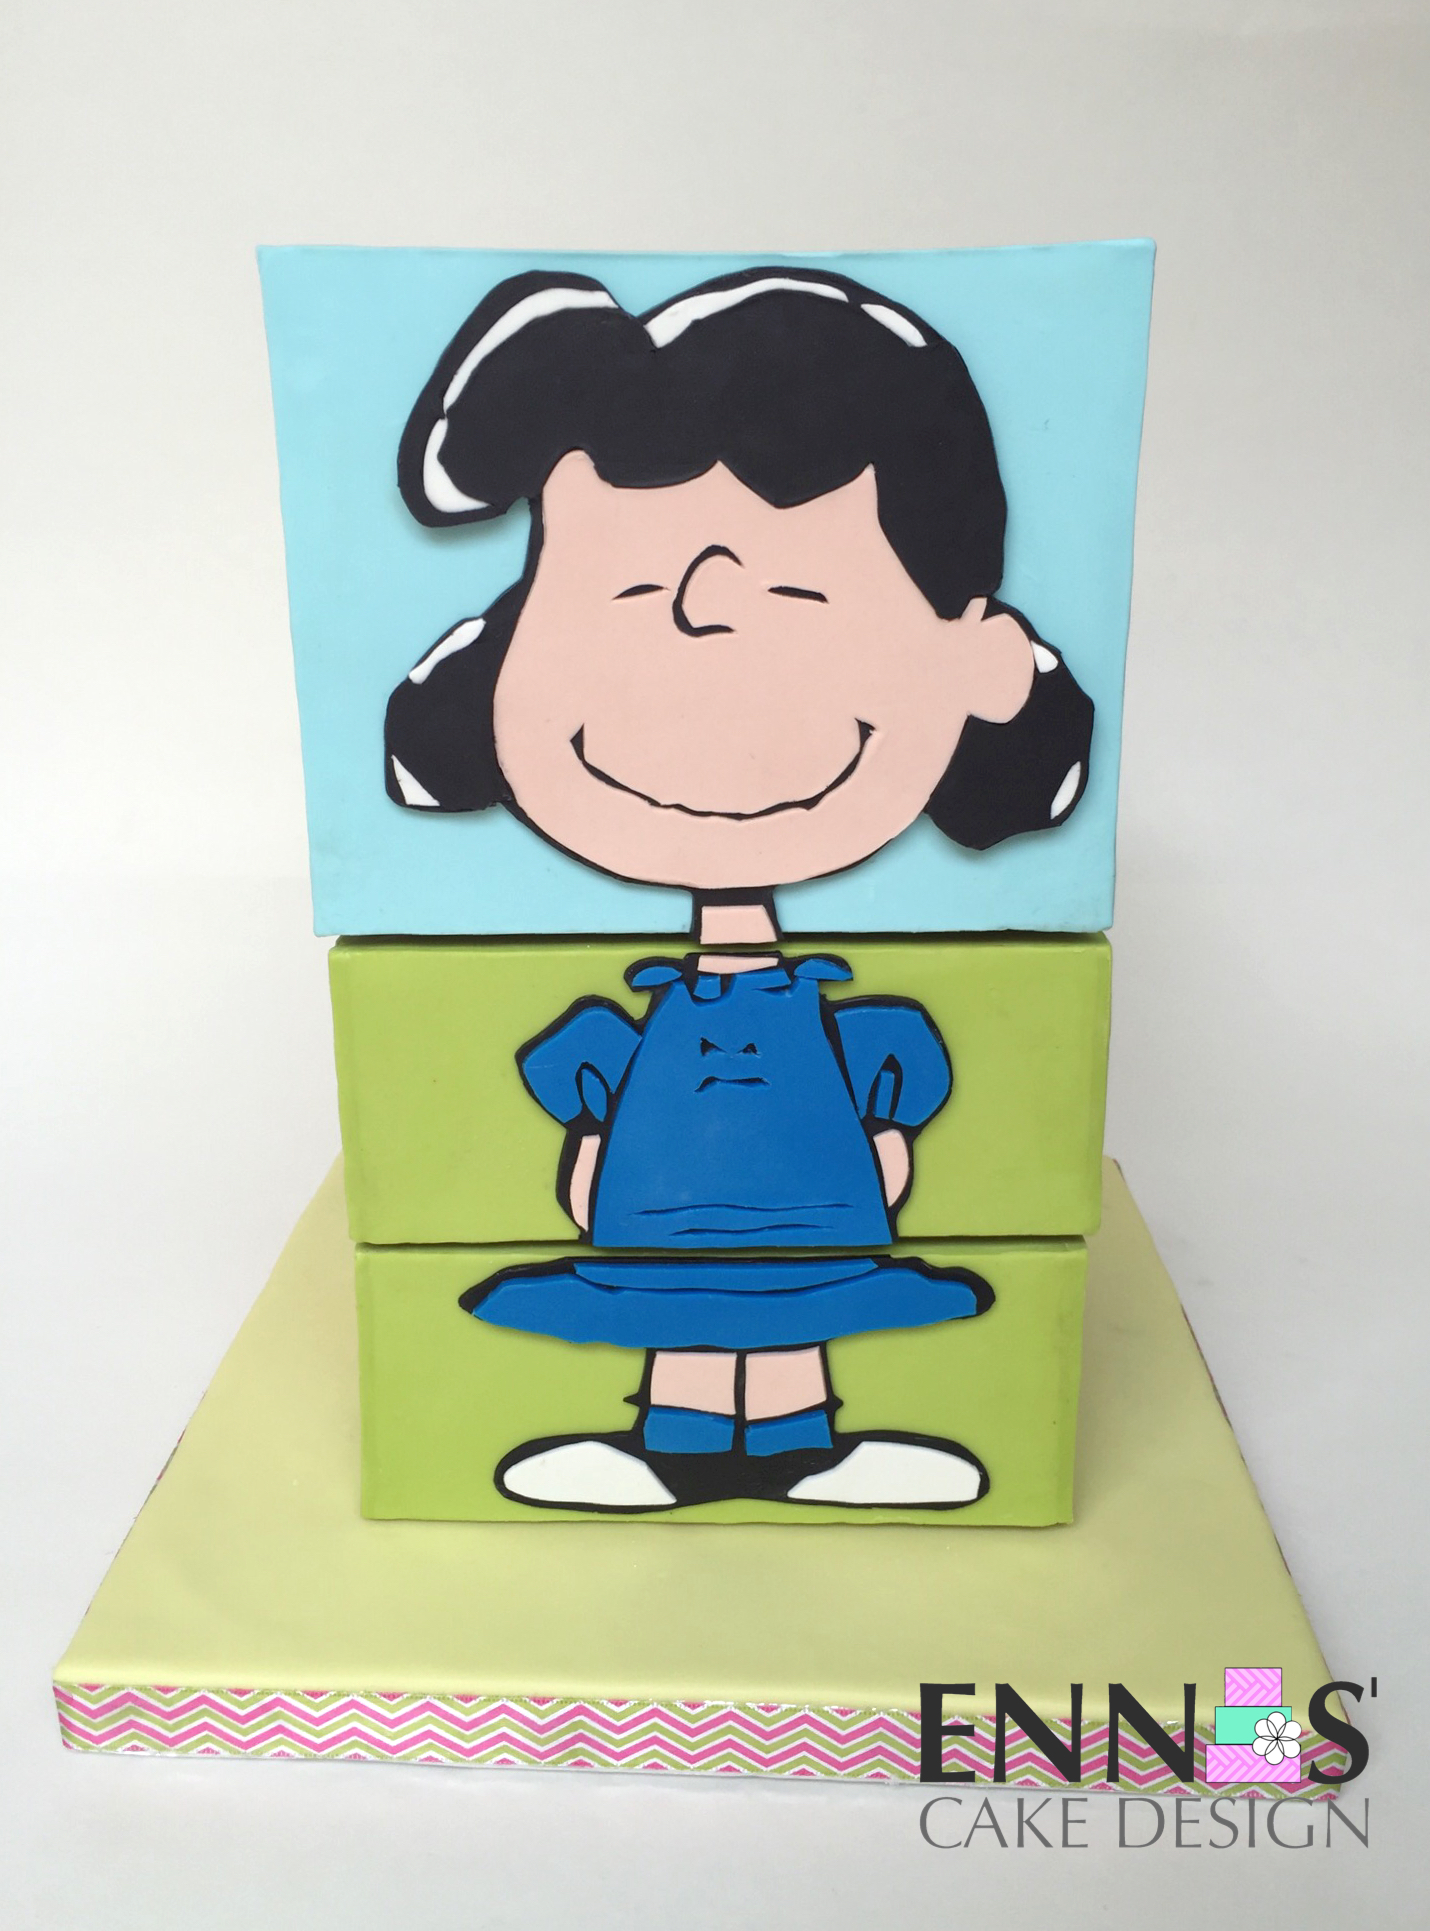
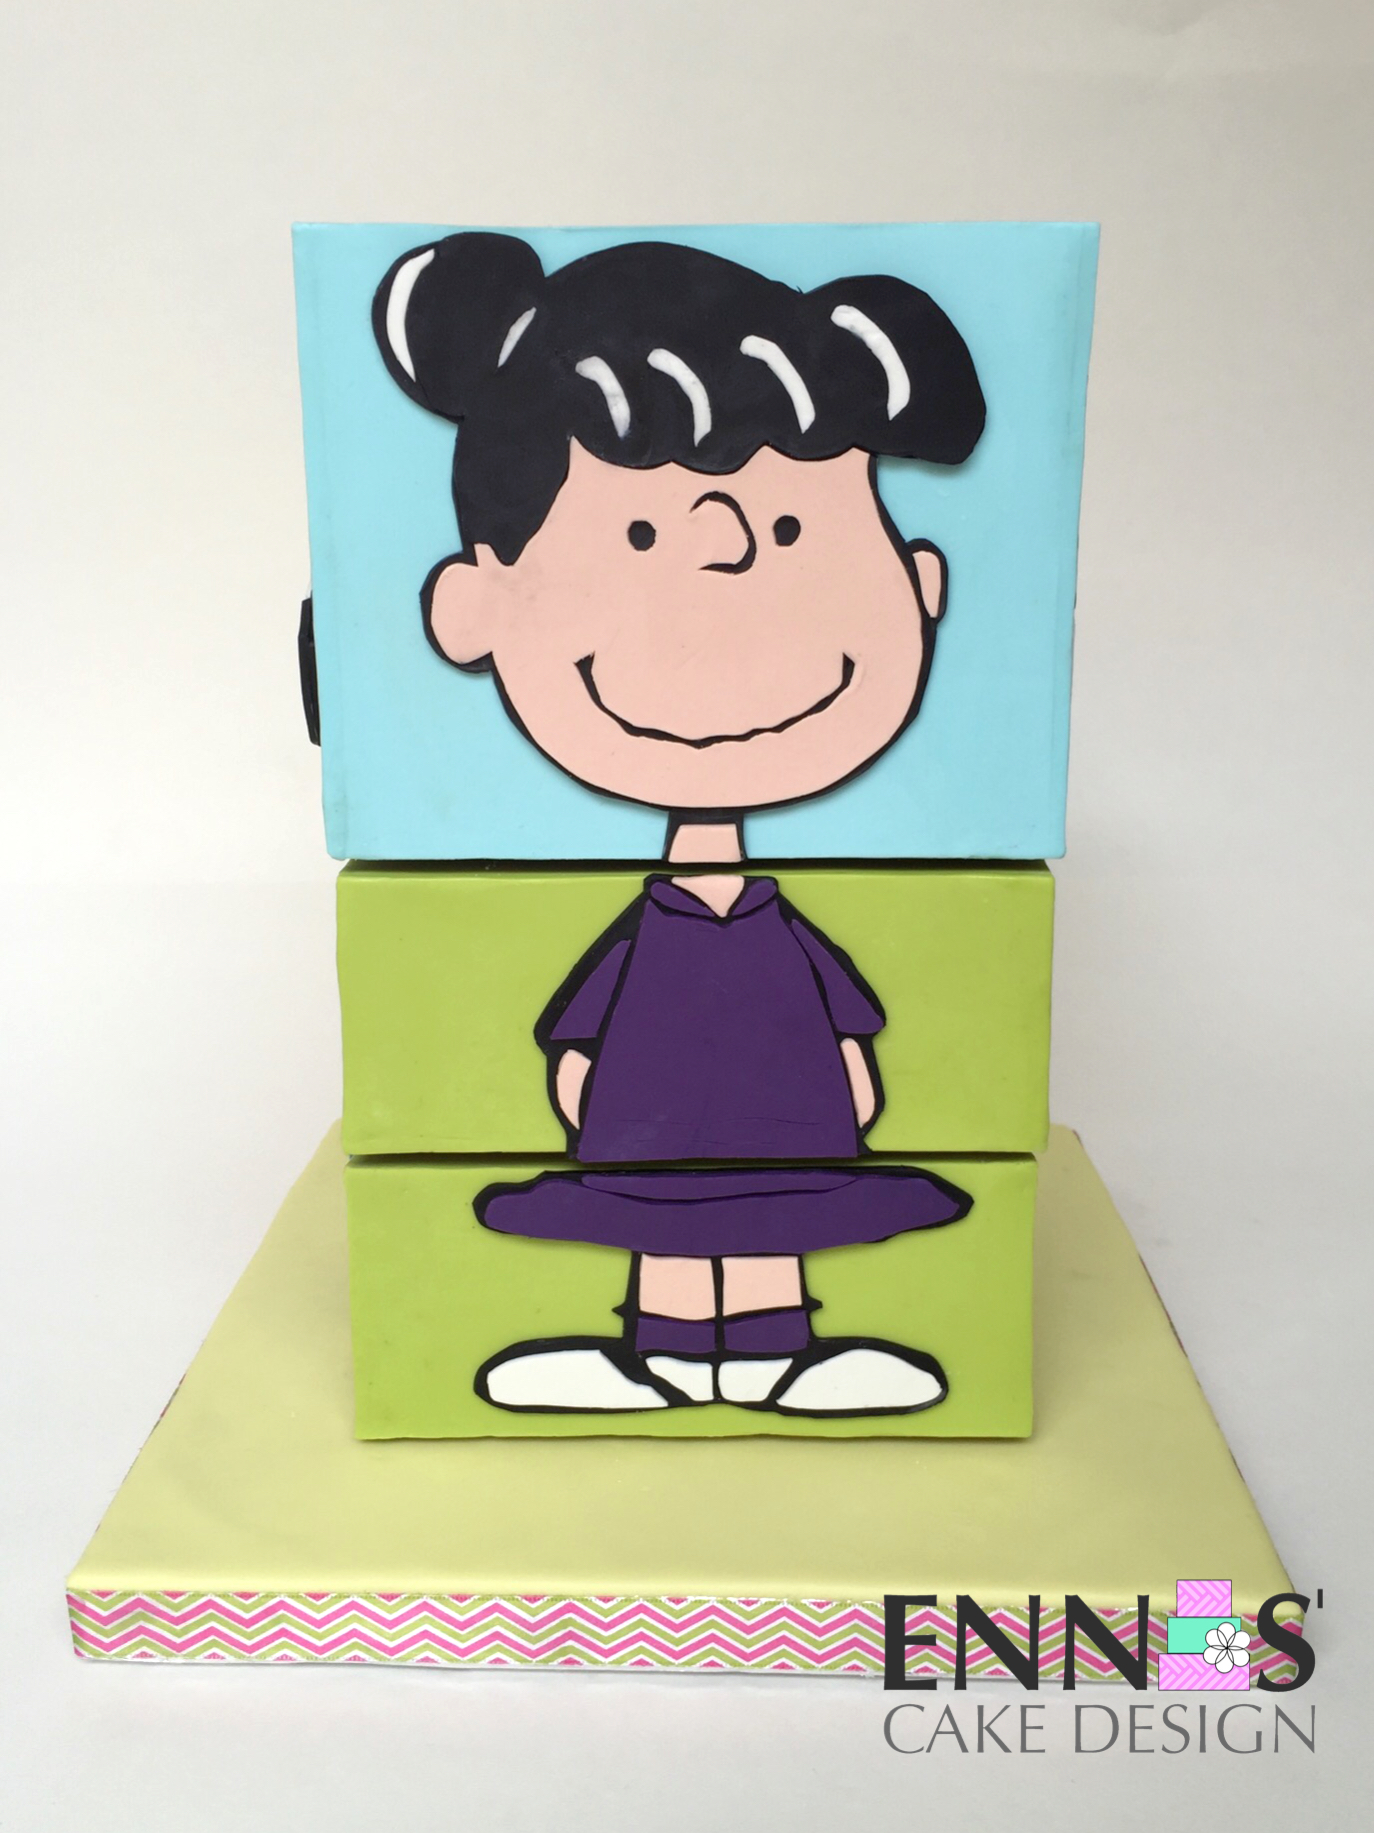
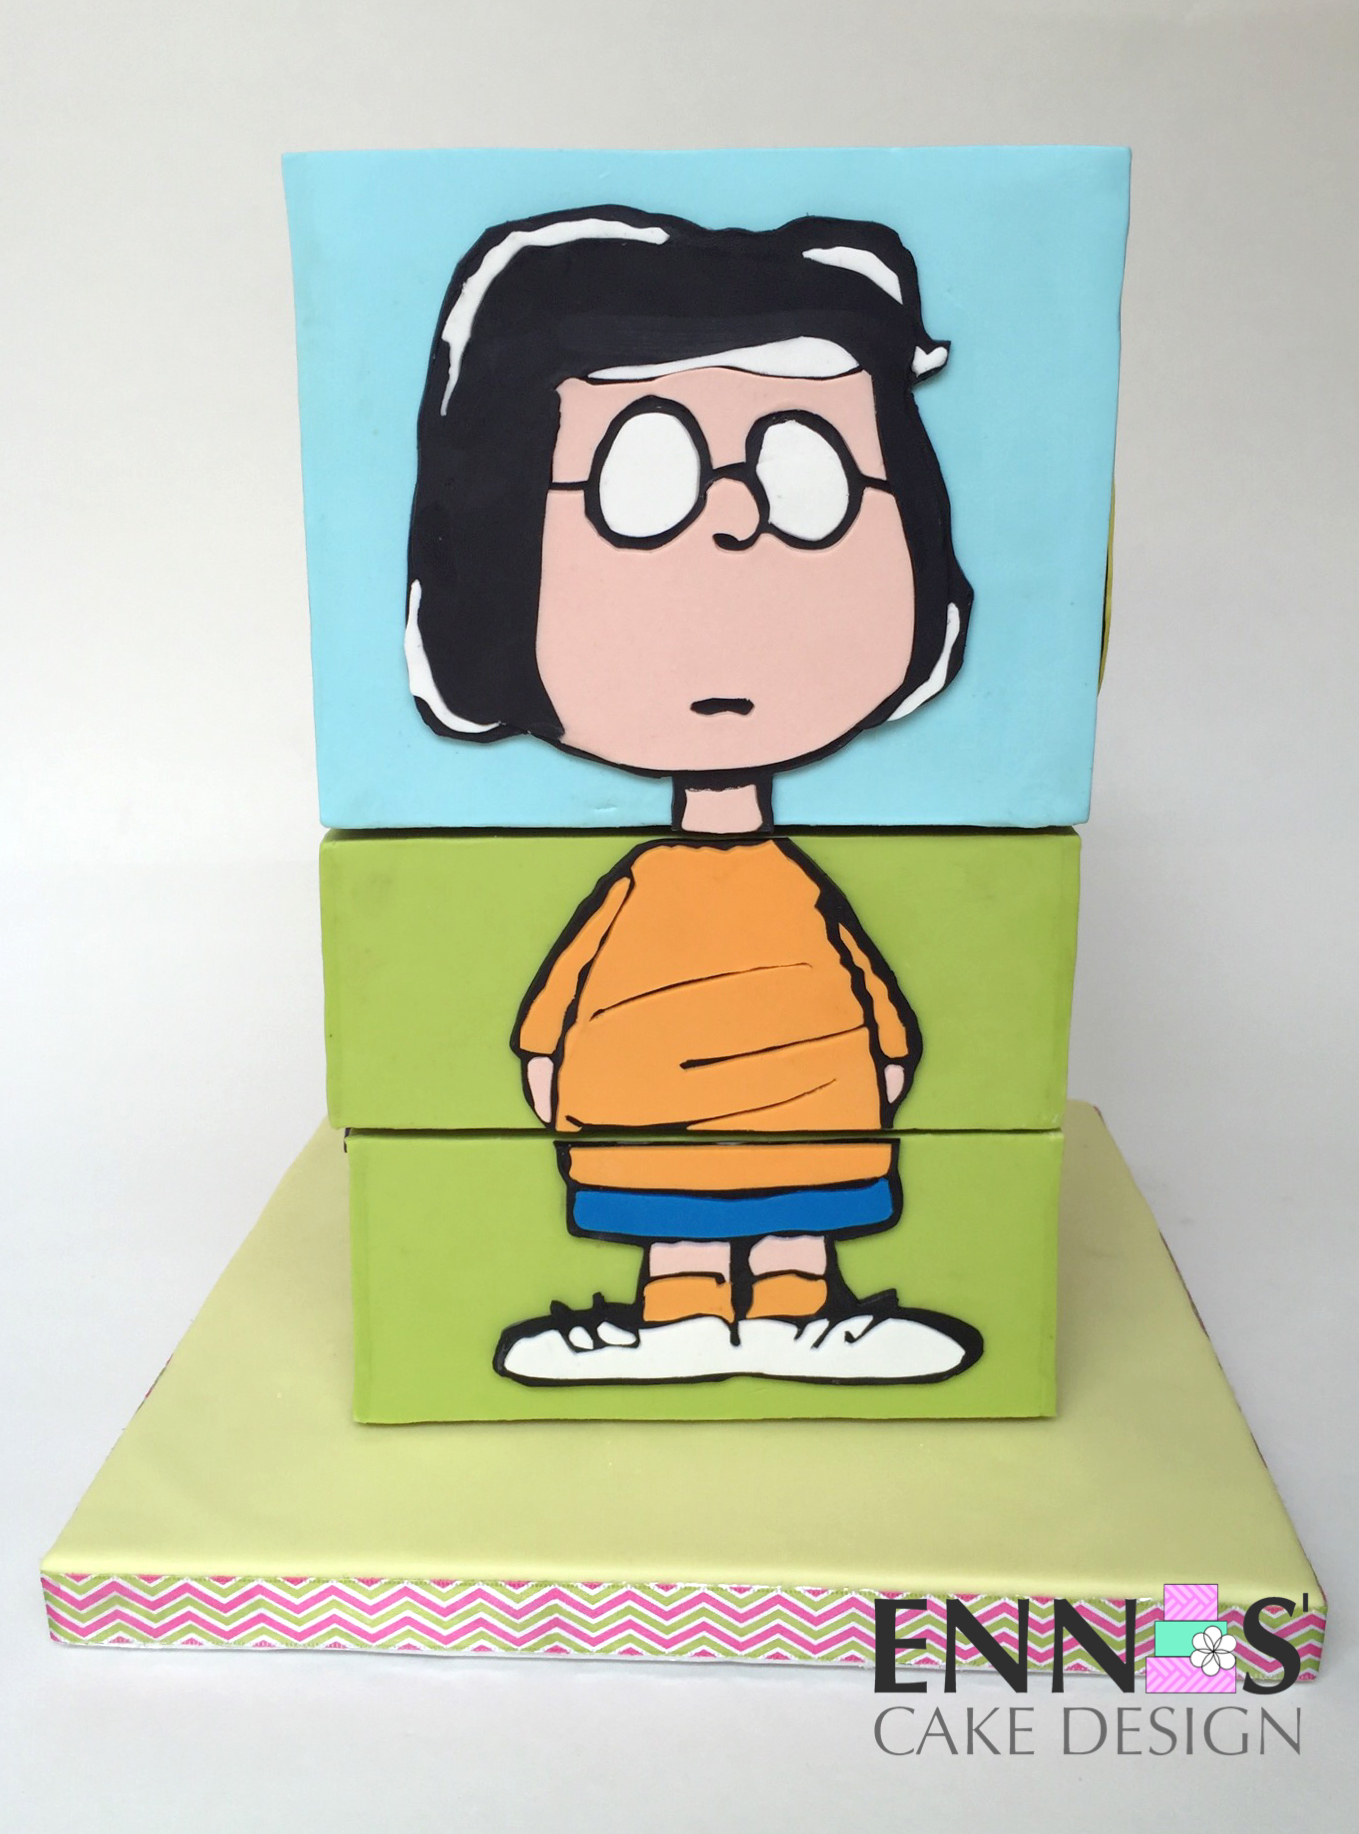
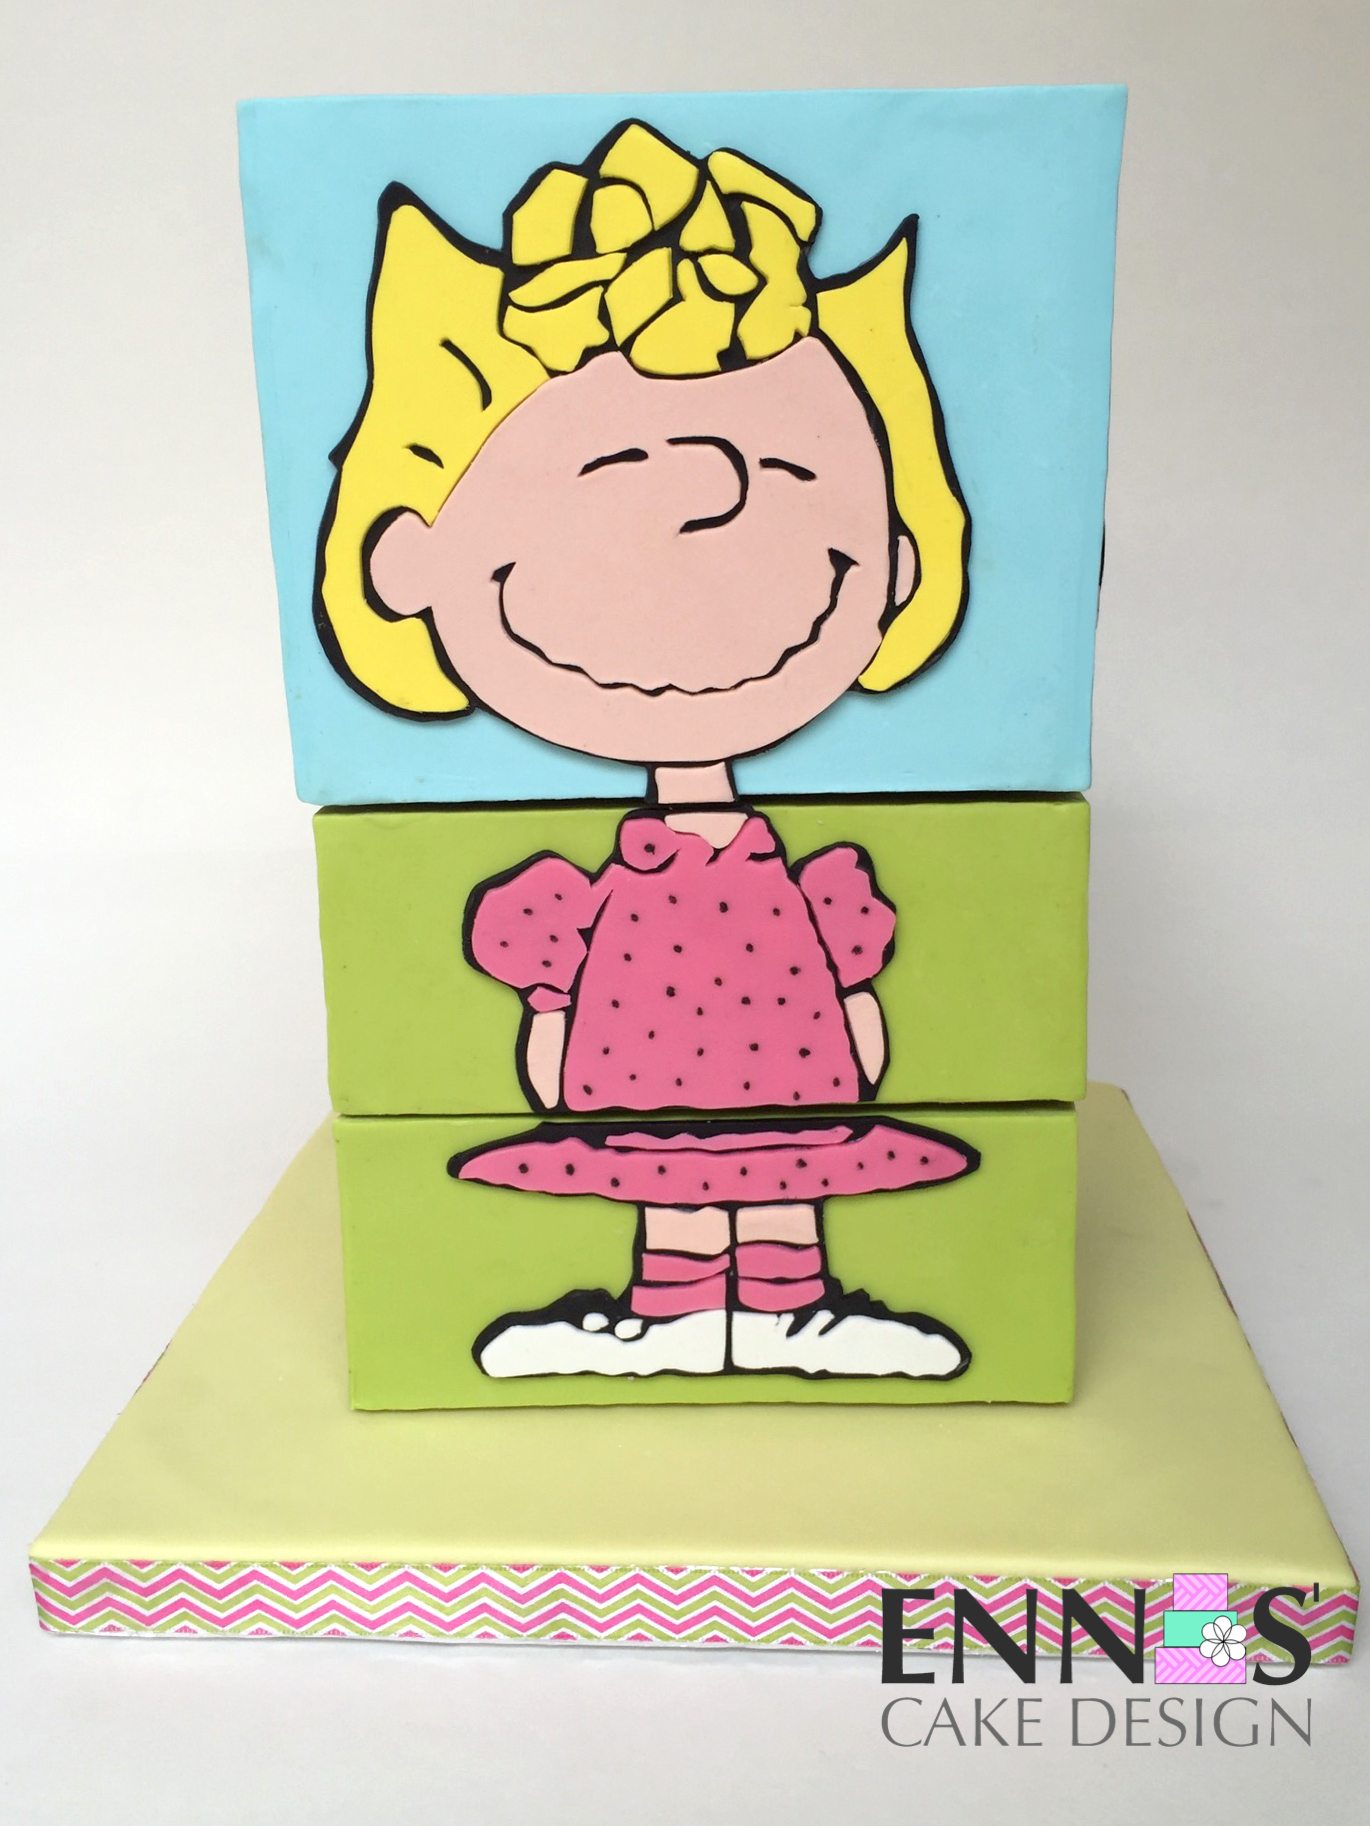
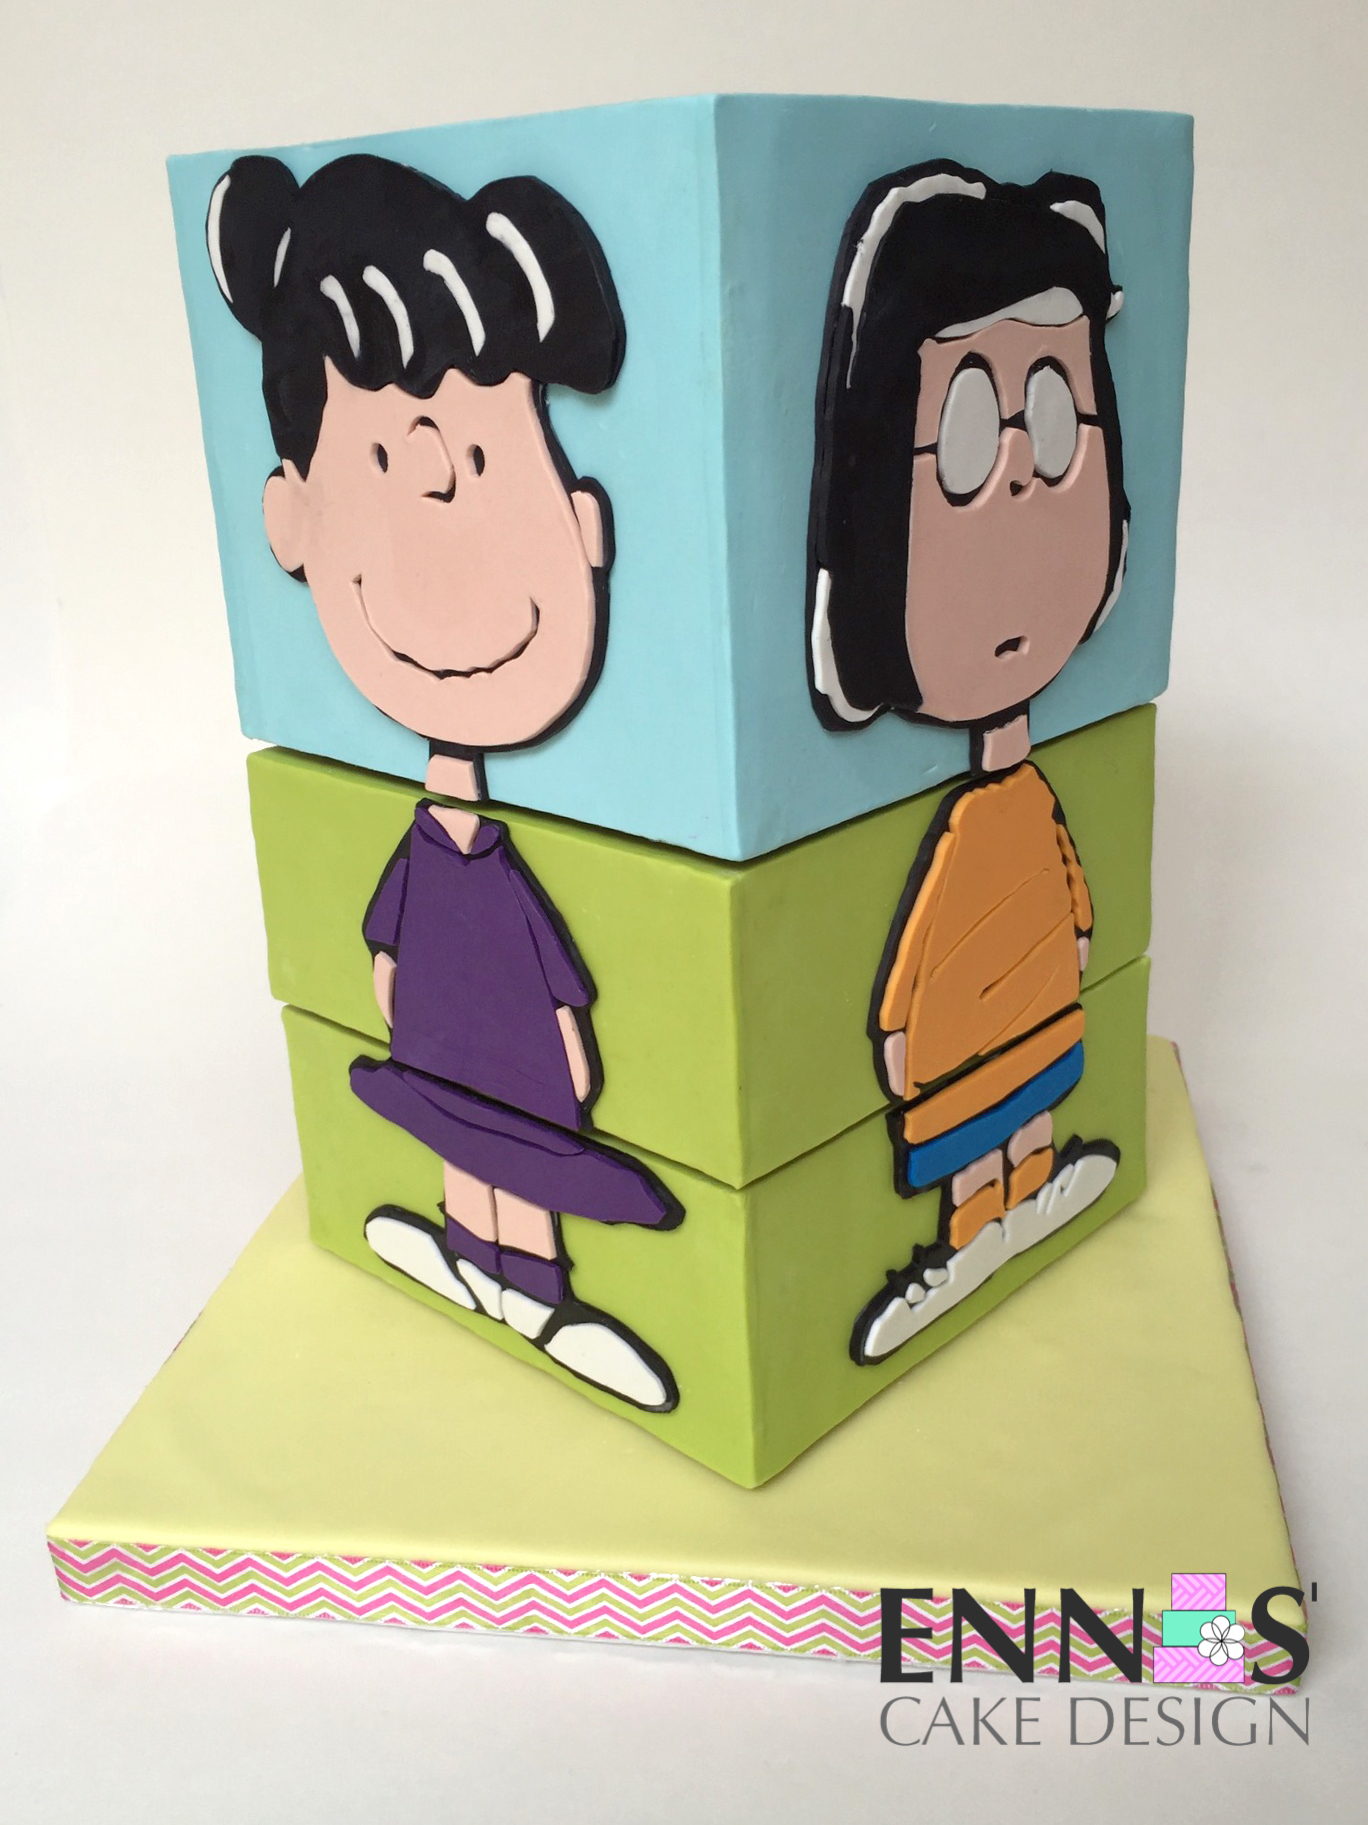
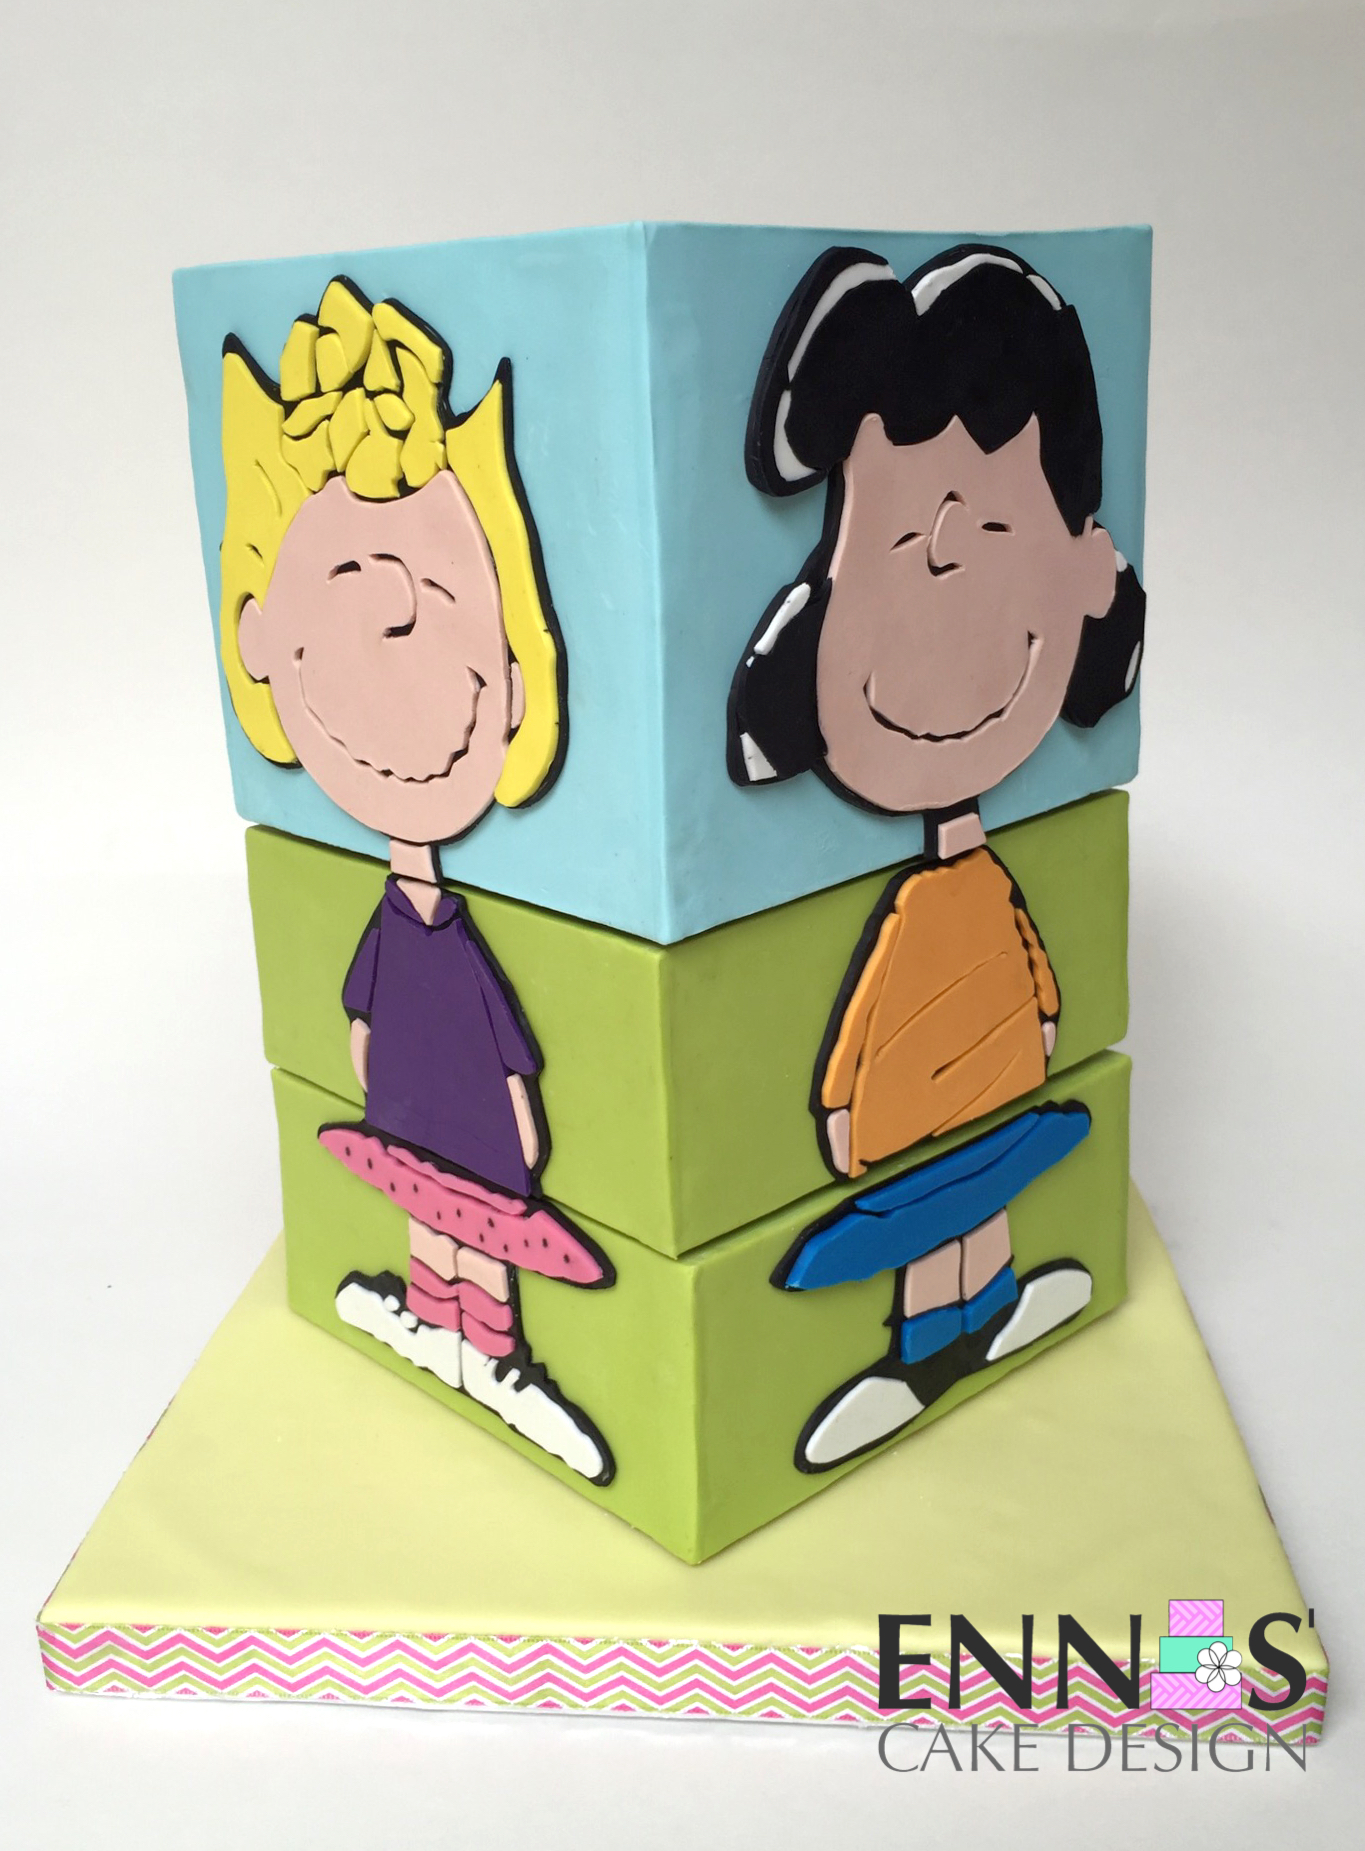
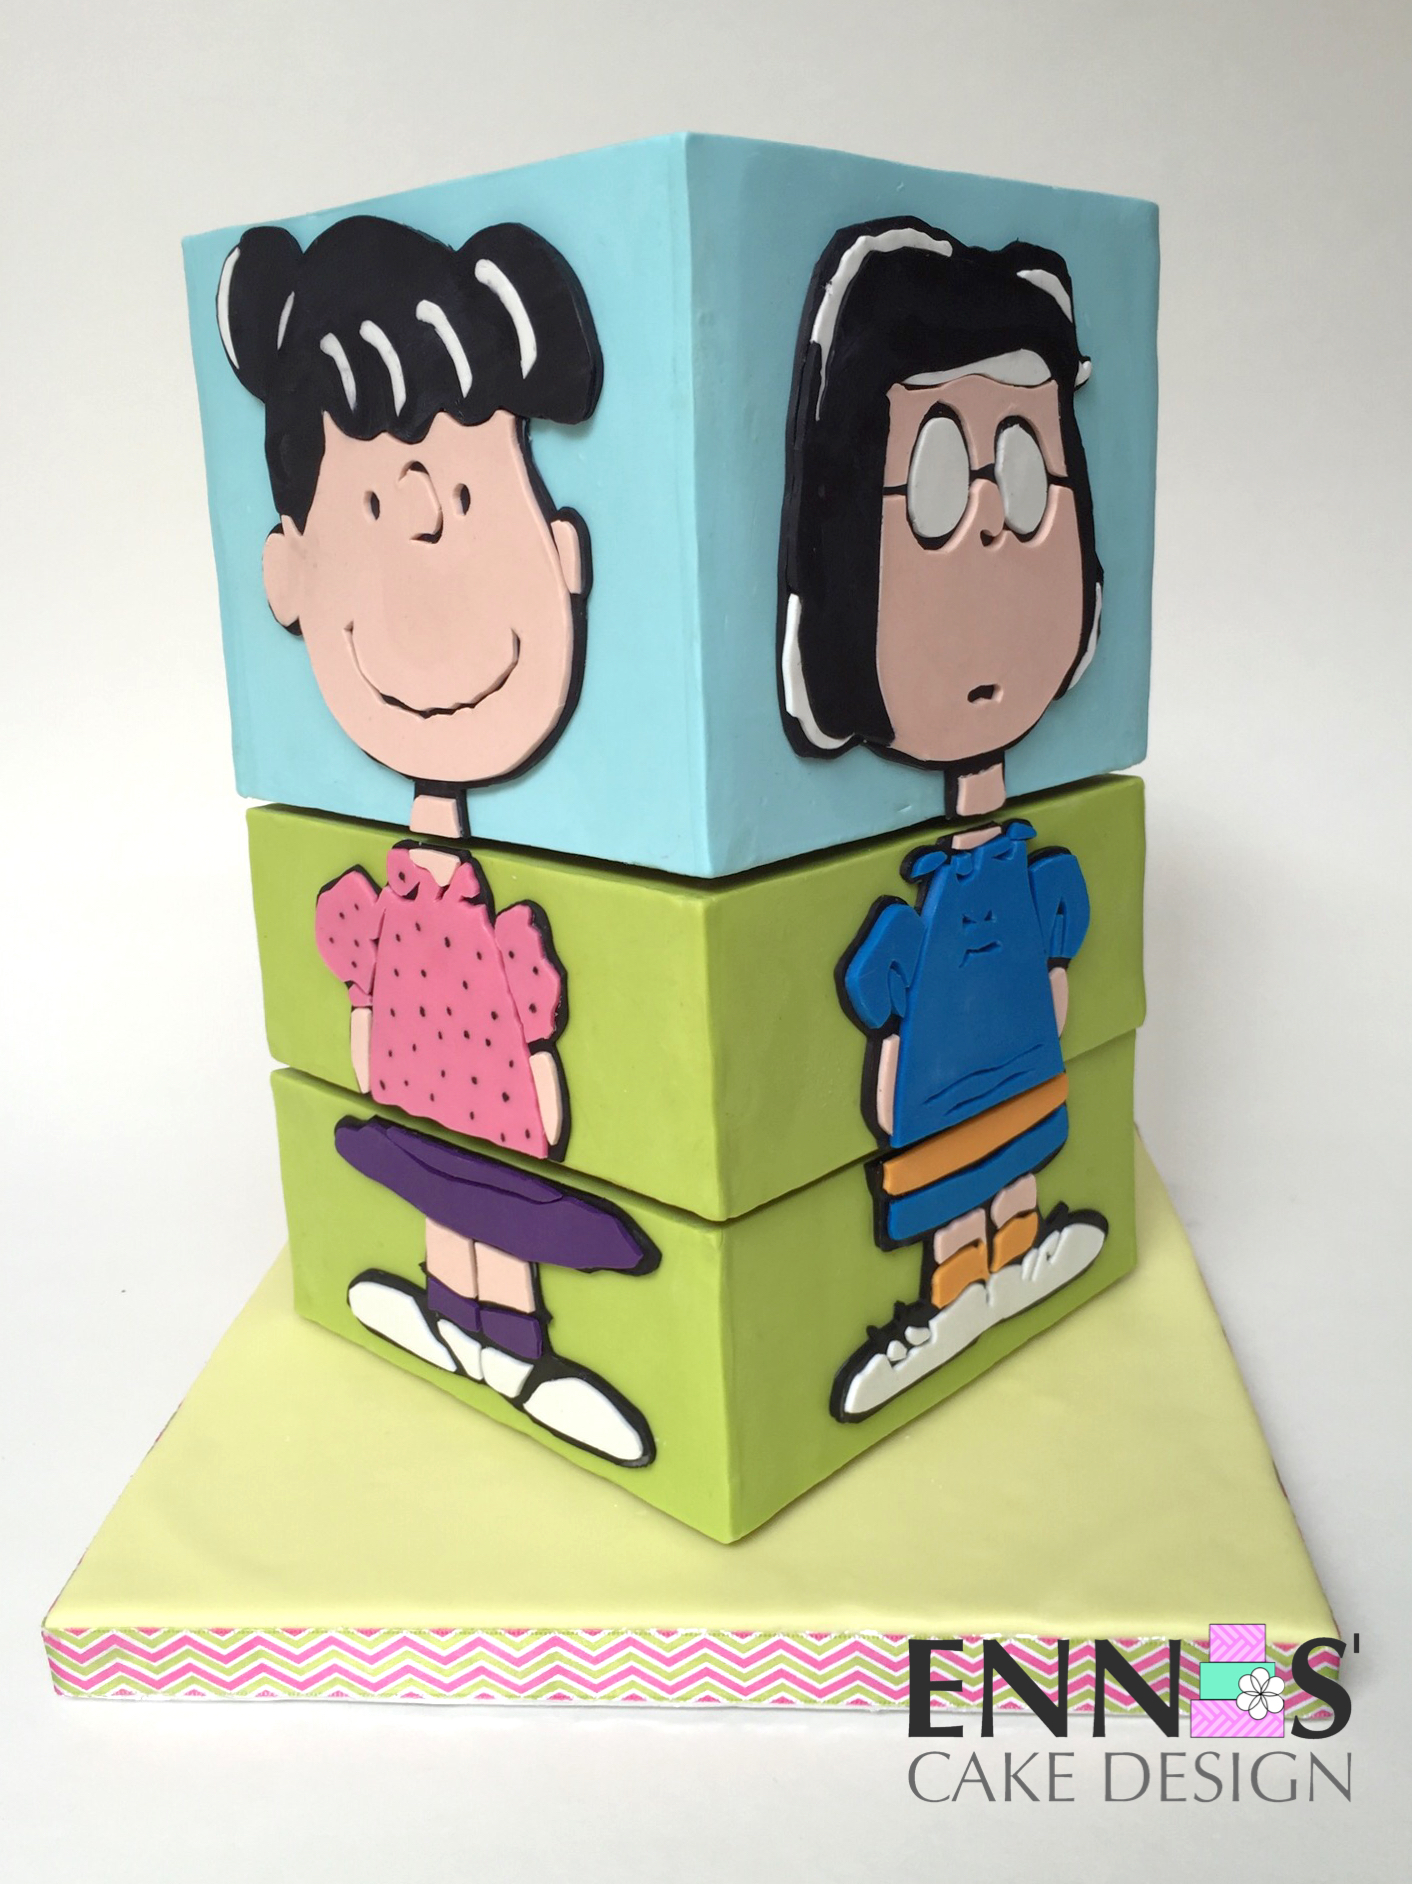
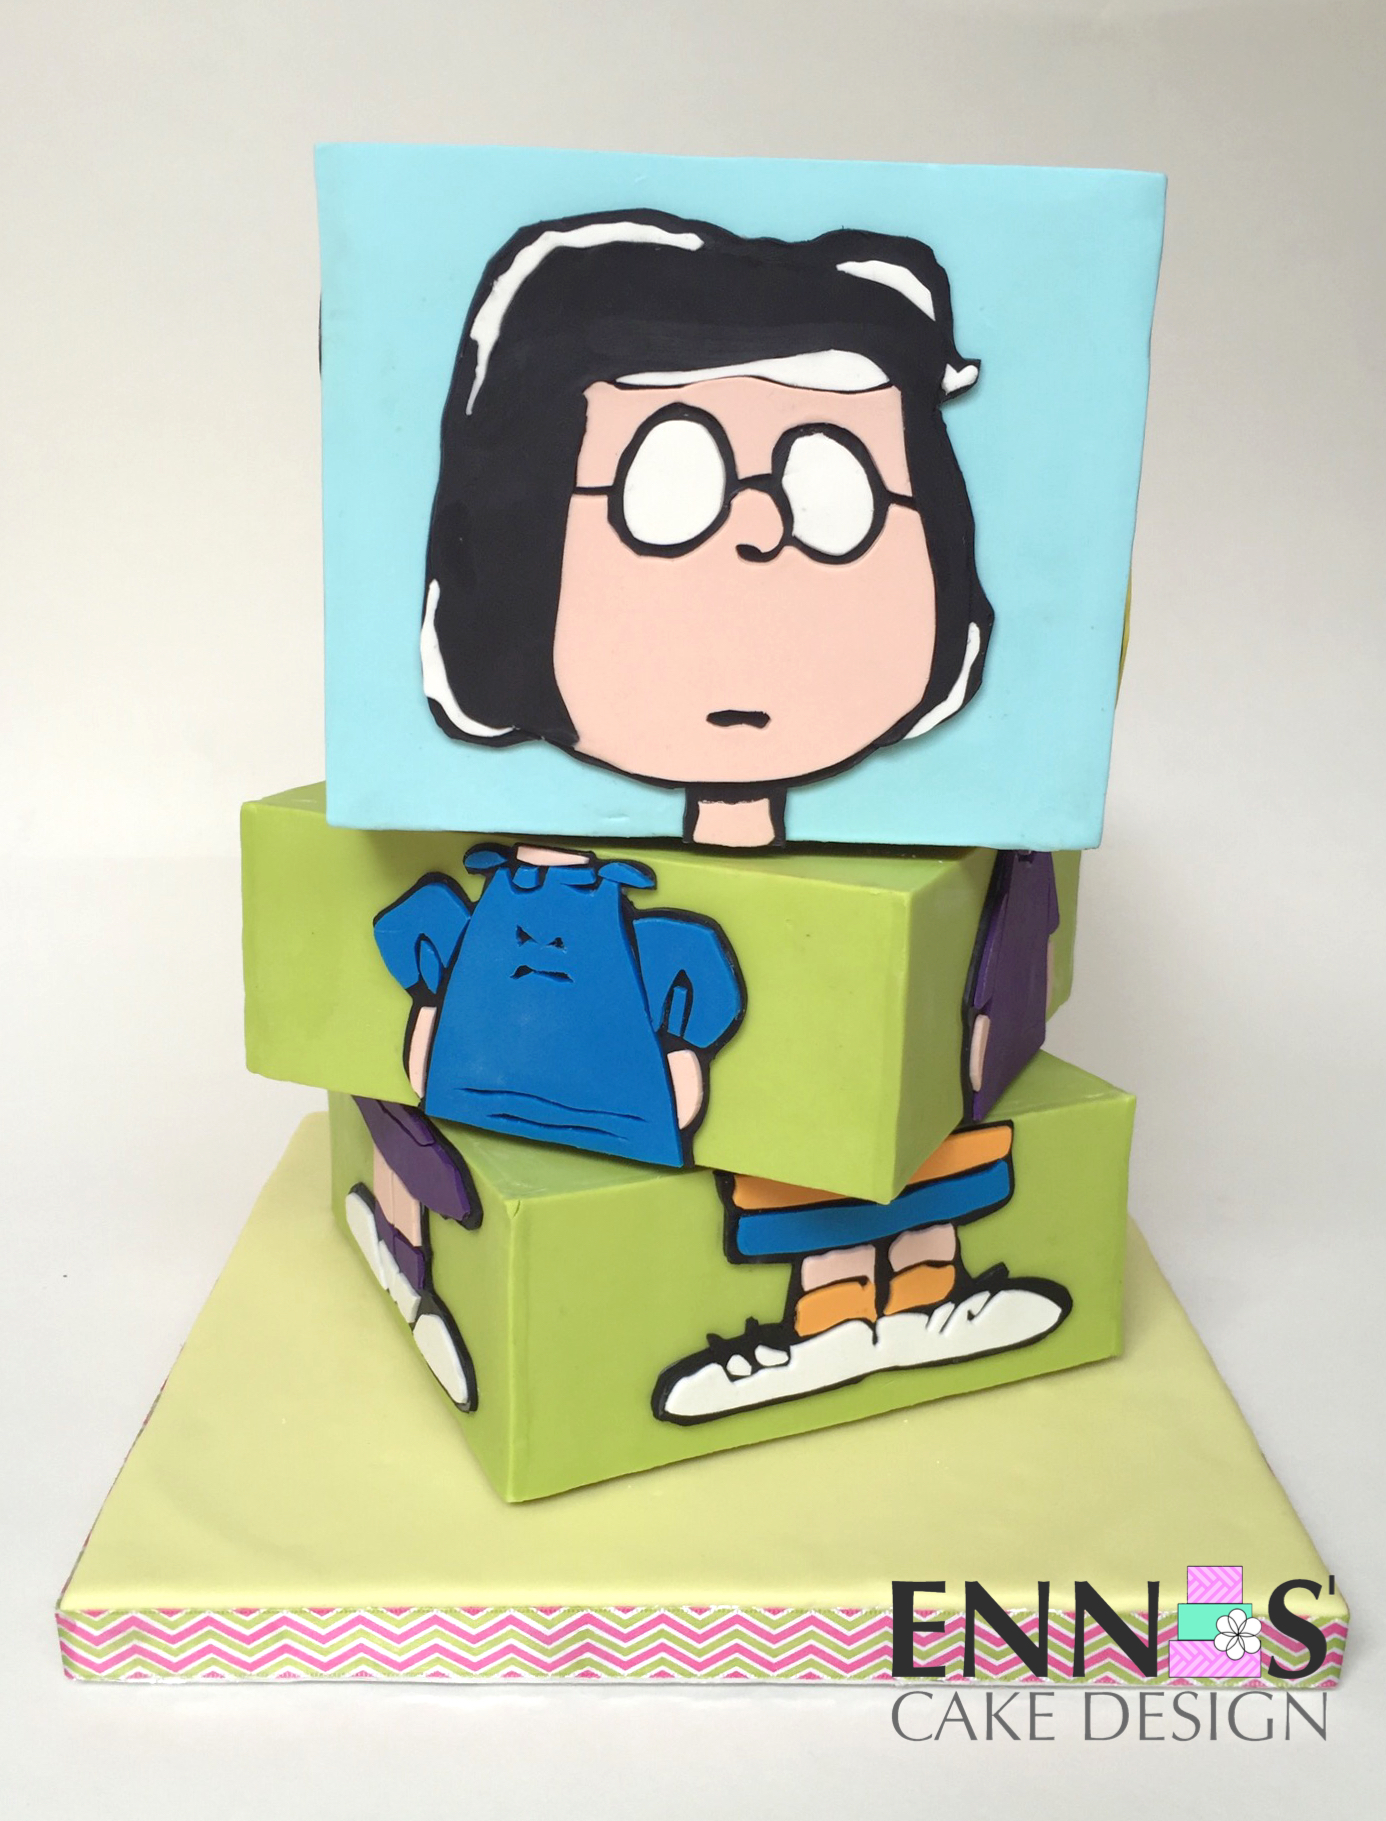
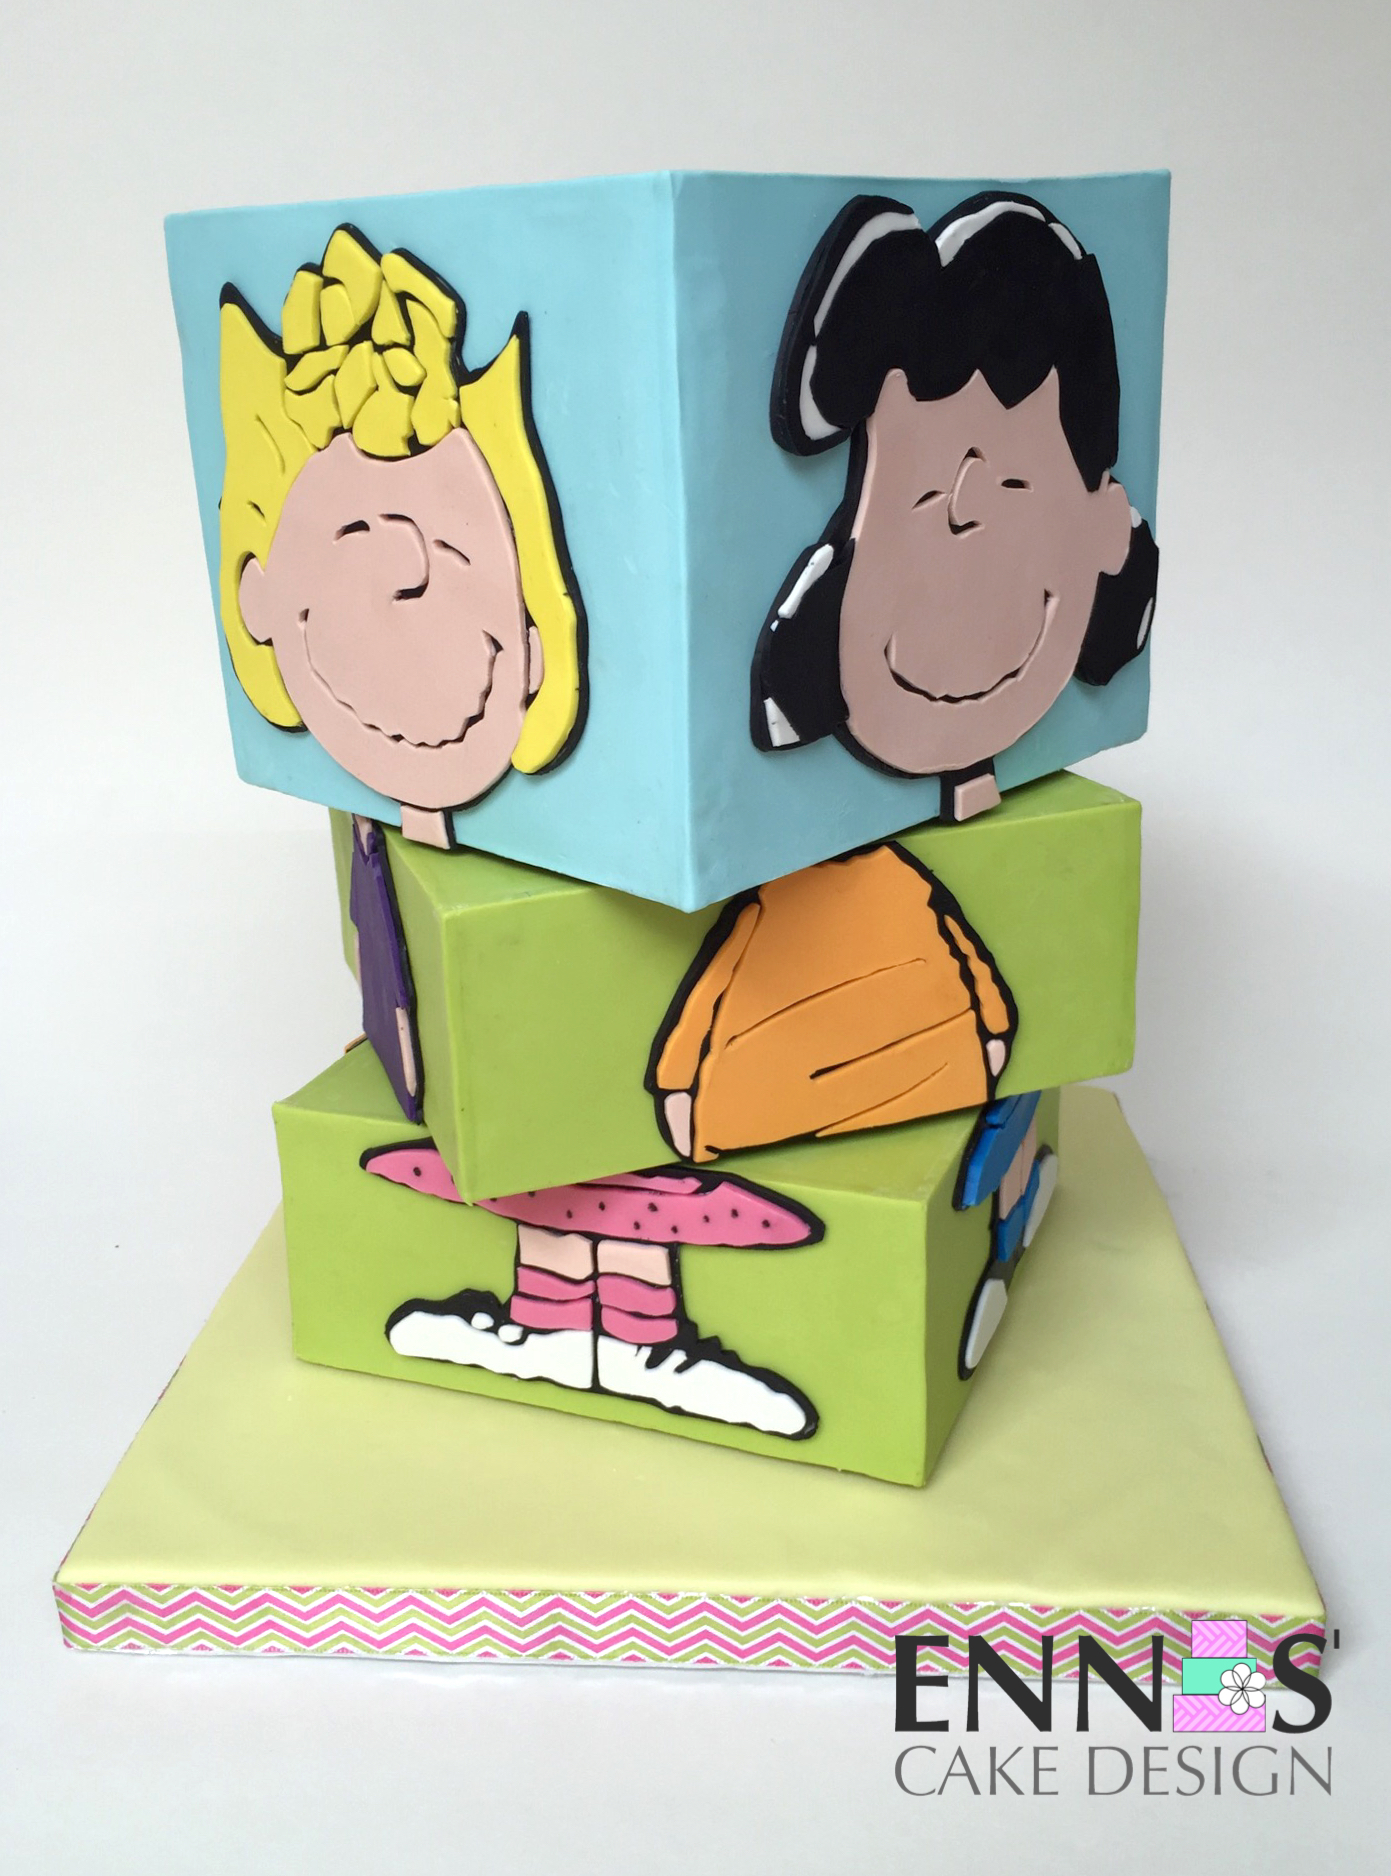
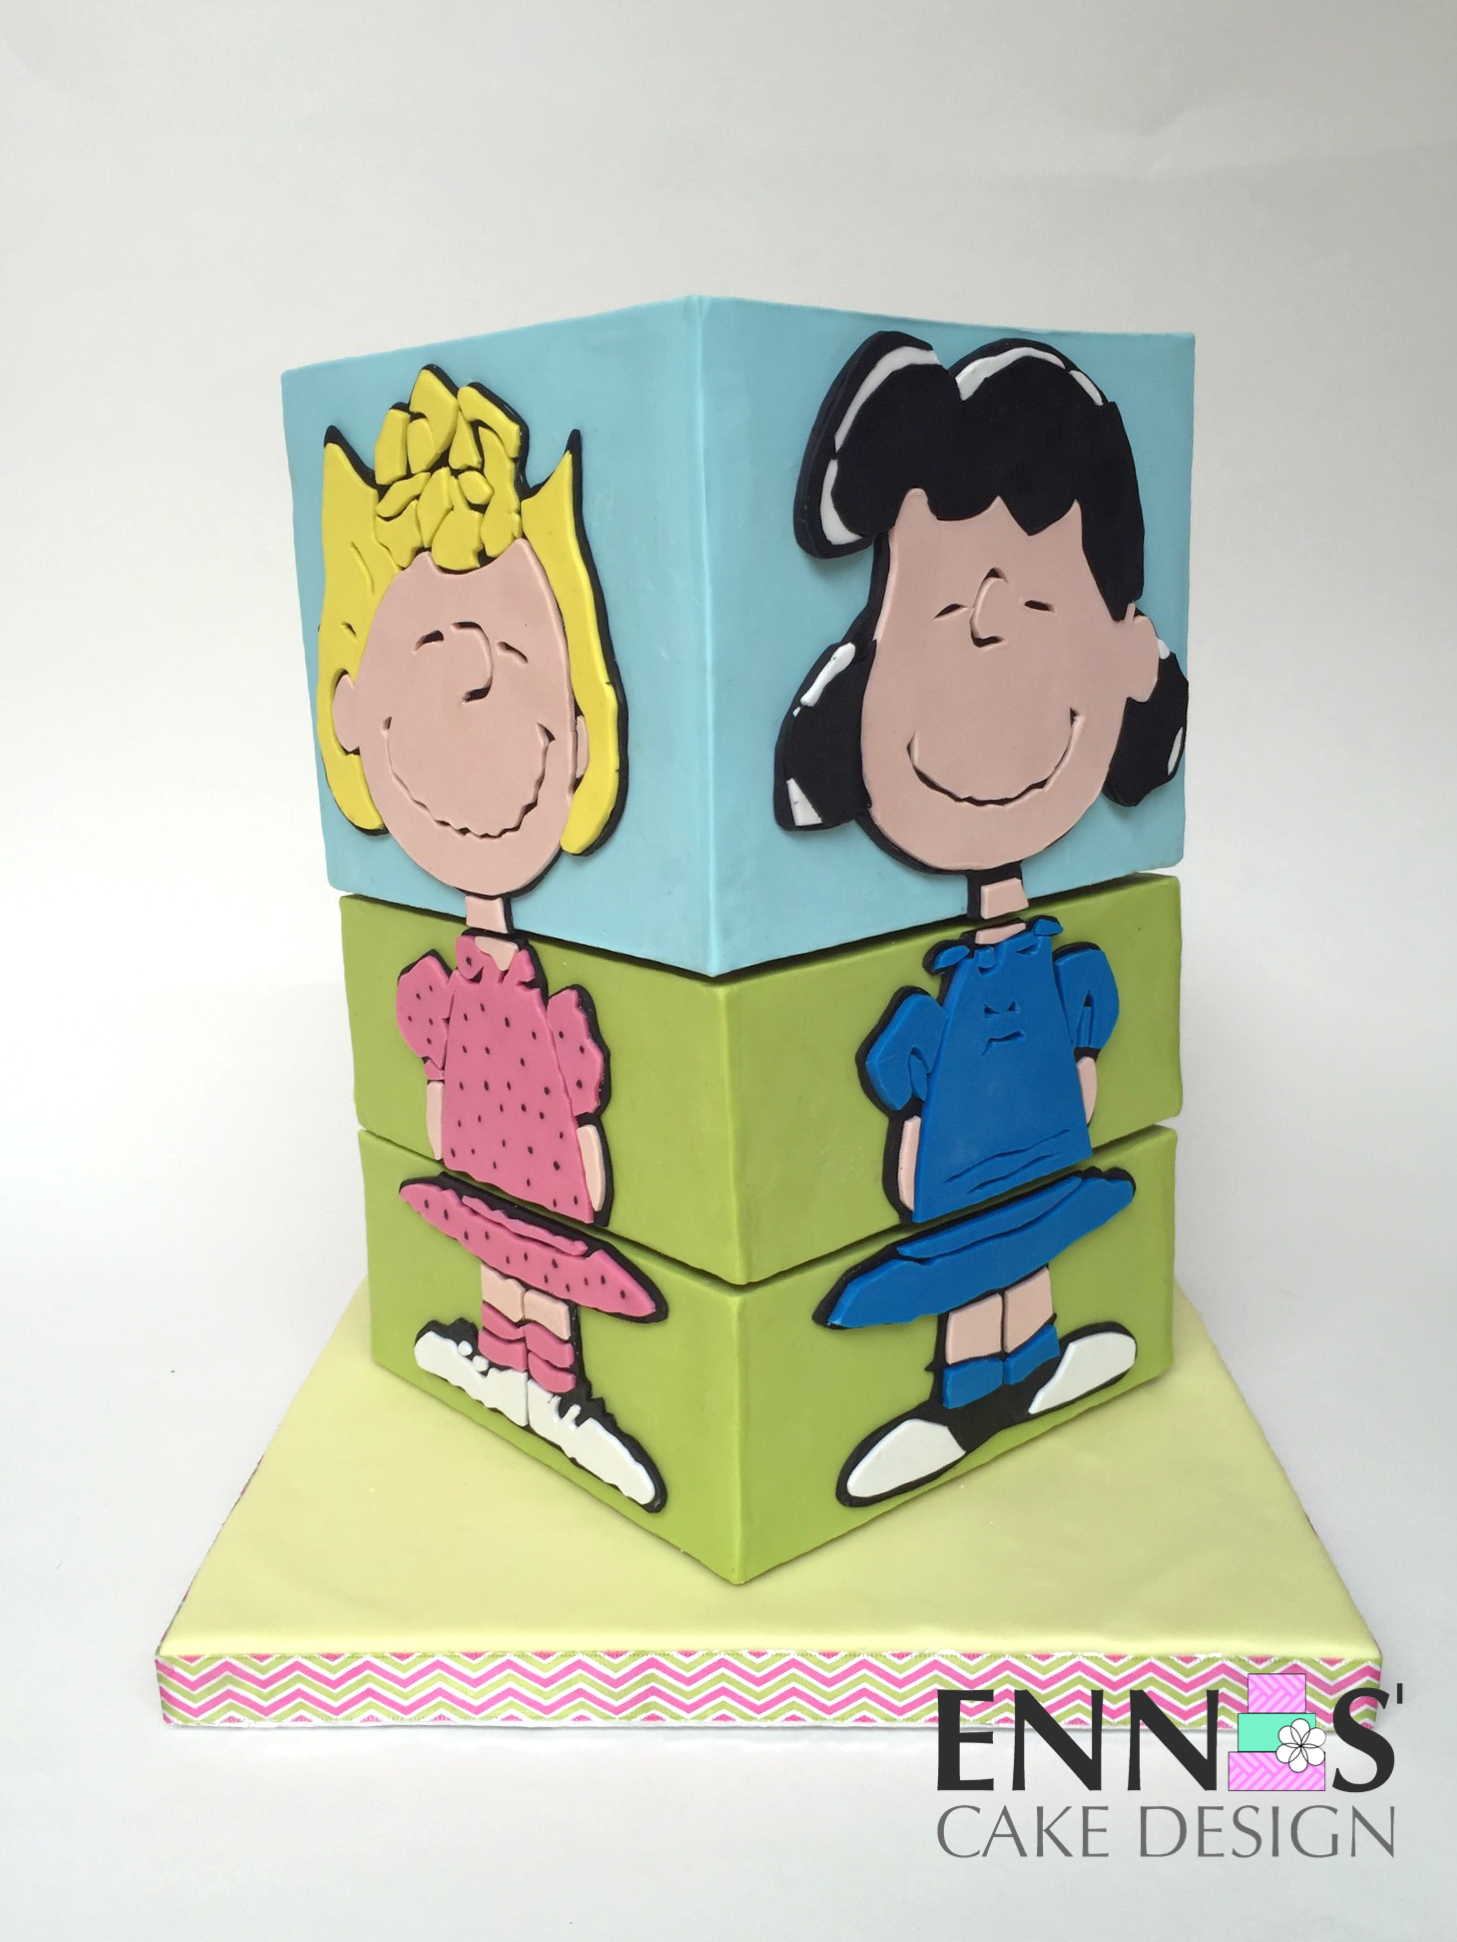
I made a moving Rubik's cube cake for my sister's birthday and posted a video of the cake a year ago. The response was off the charts and everyone wanted to know how I did it, that's how the Moving Rubik's Cube cake tutorial came to be. This year I surprised my sister with another rotating birthday cake, this time with characters from her all time favorite Peanuts.

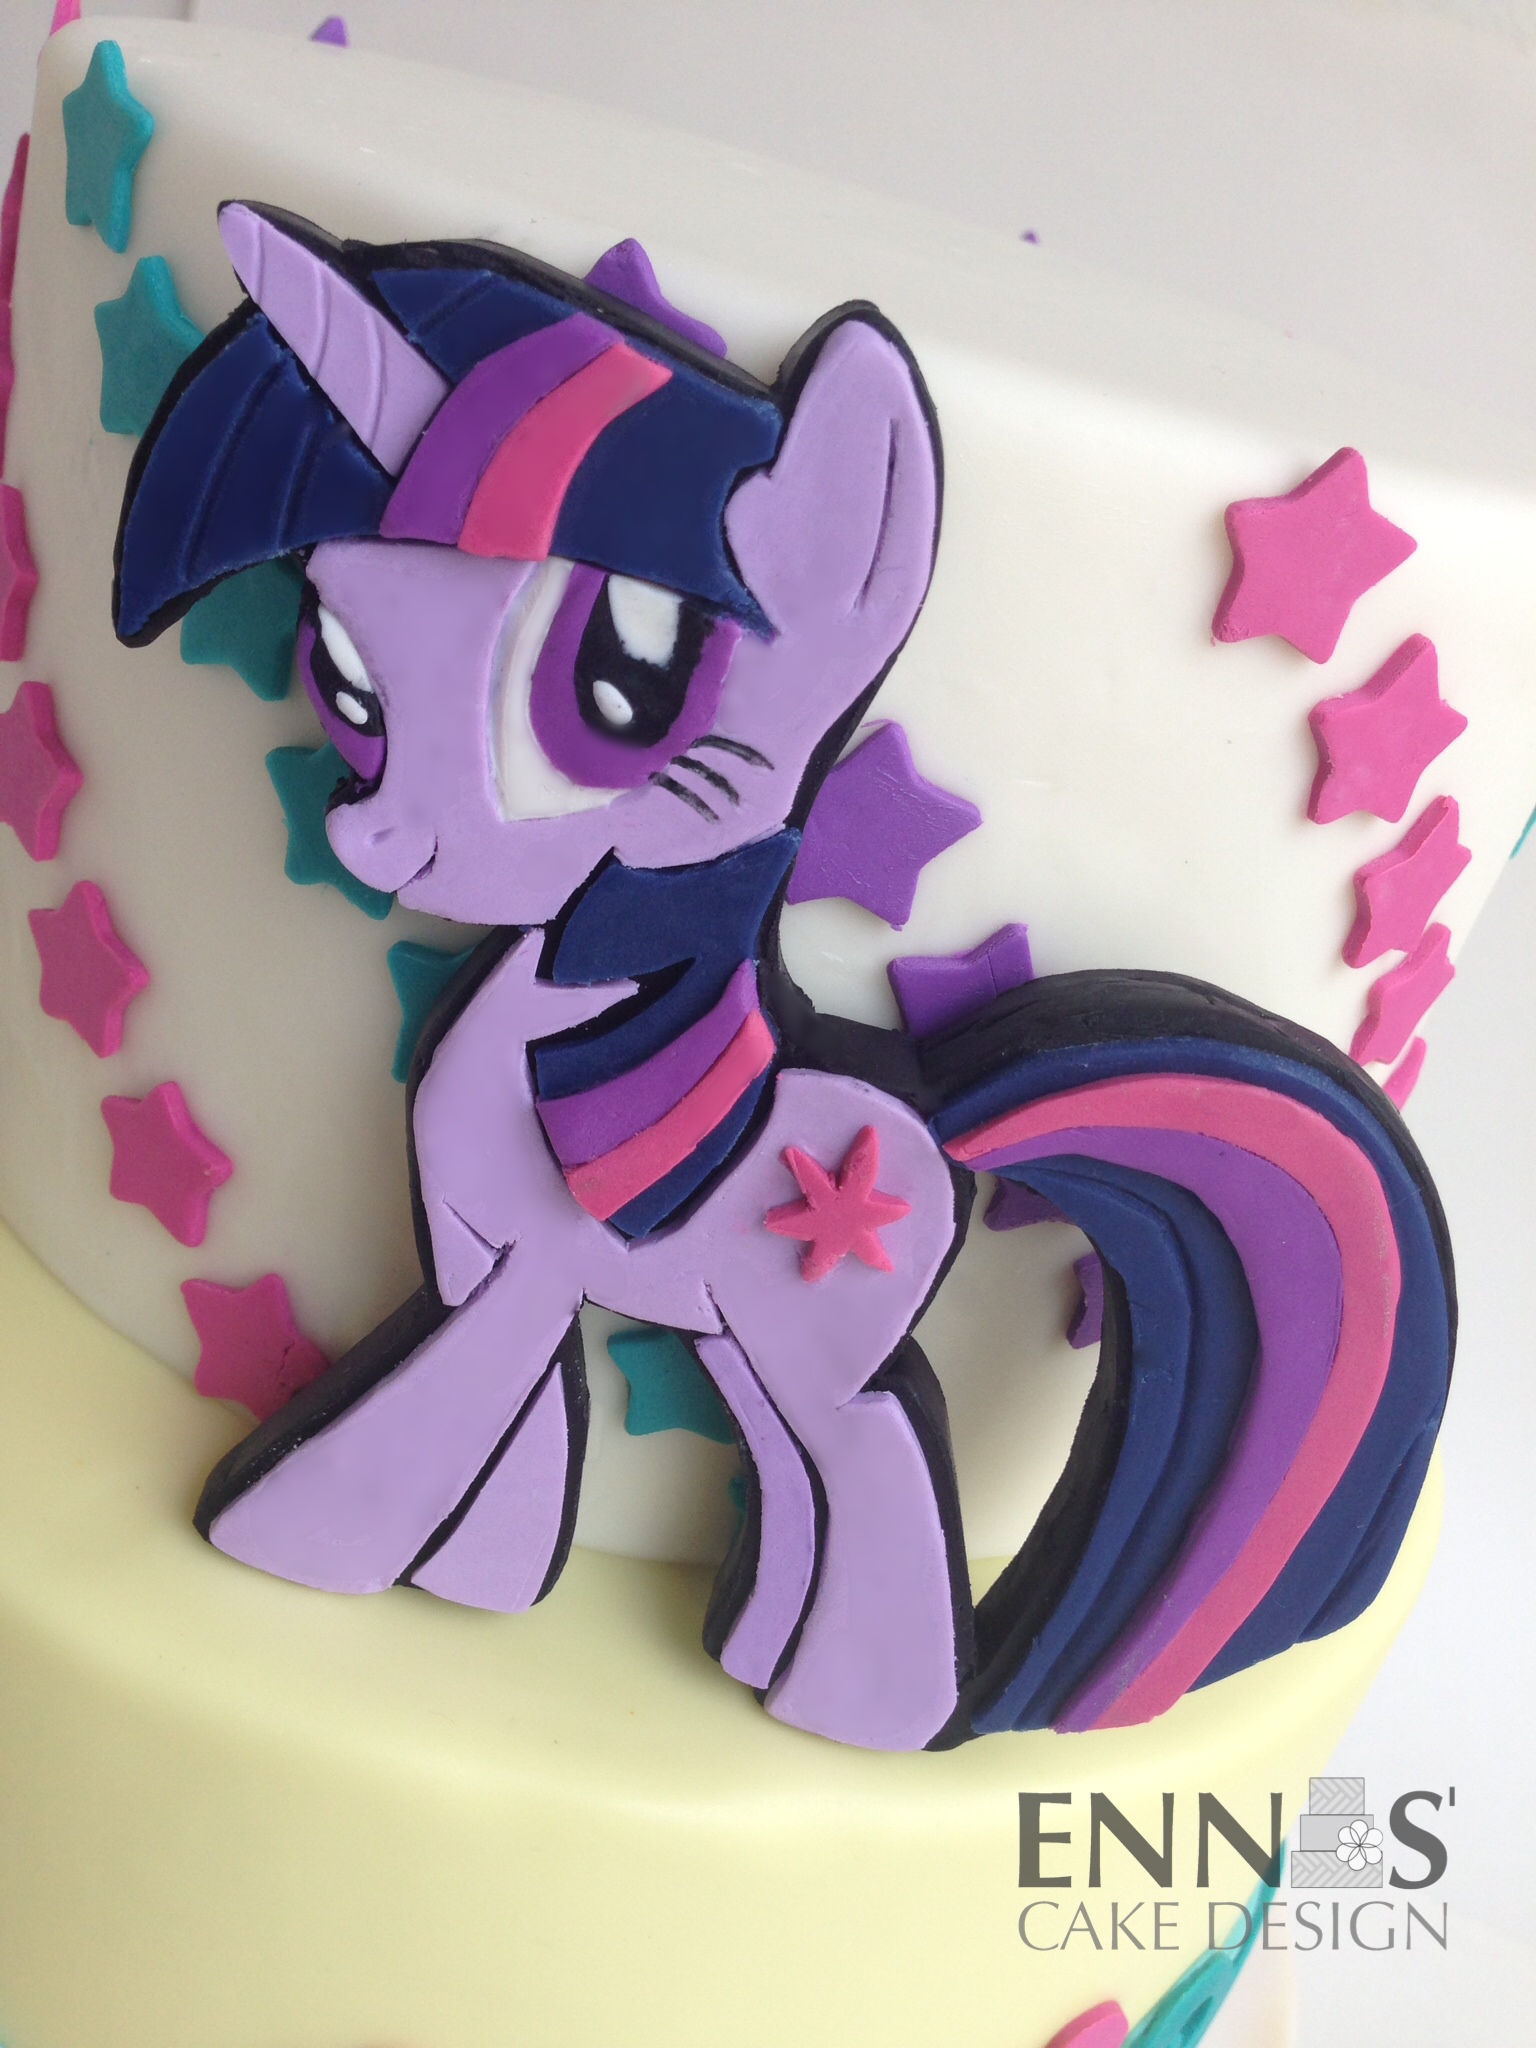
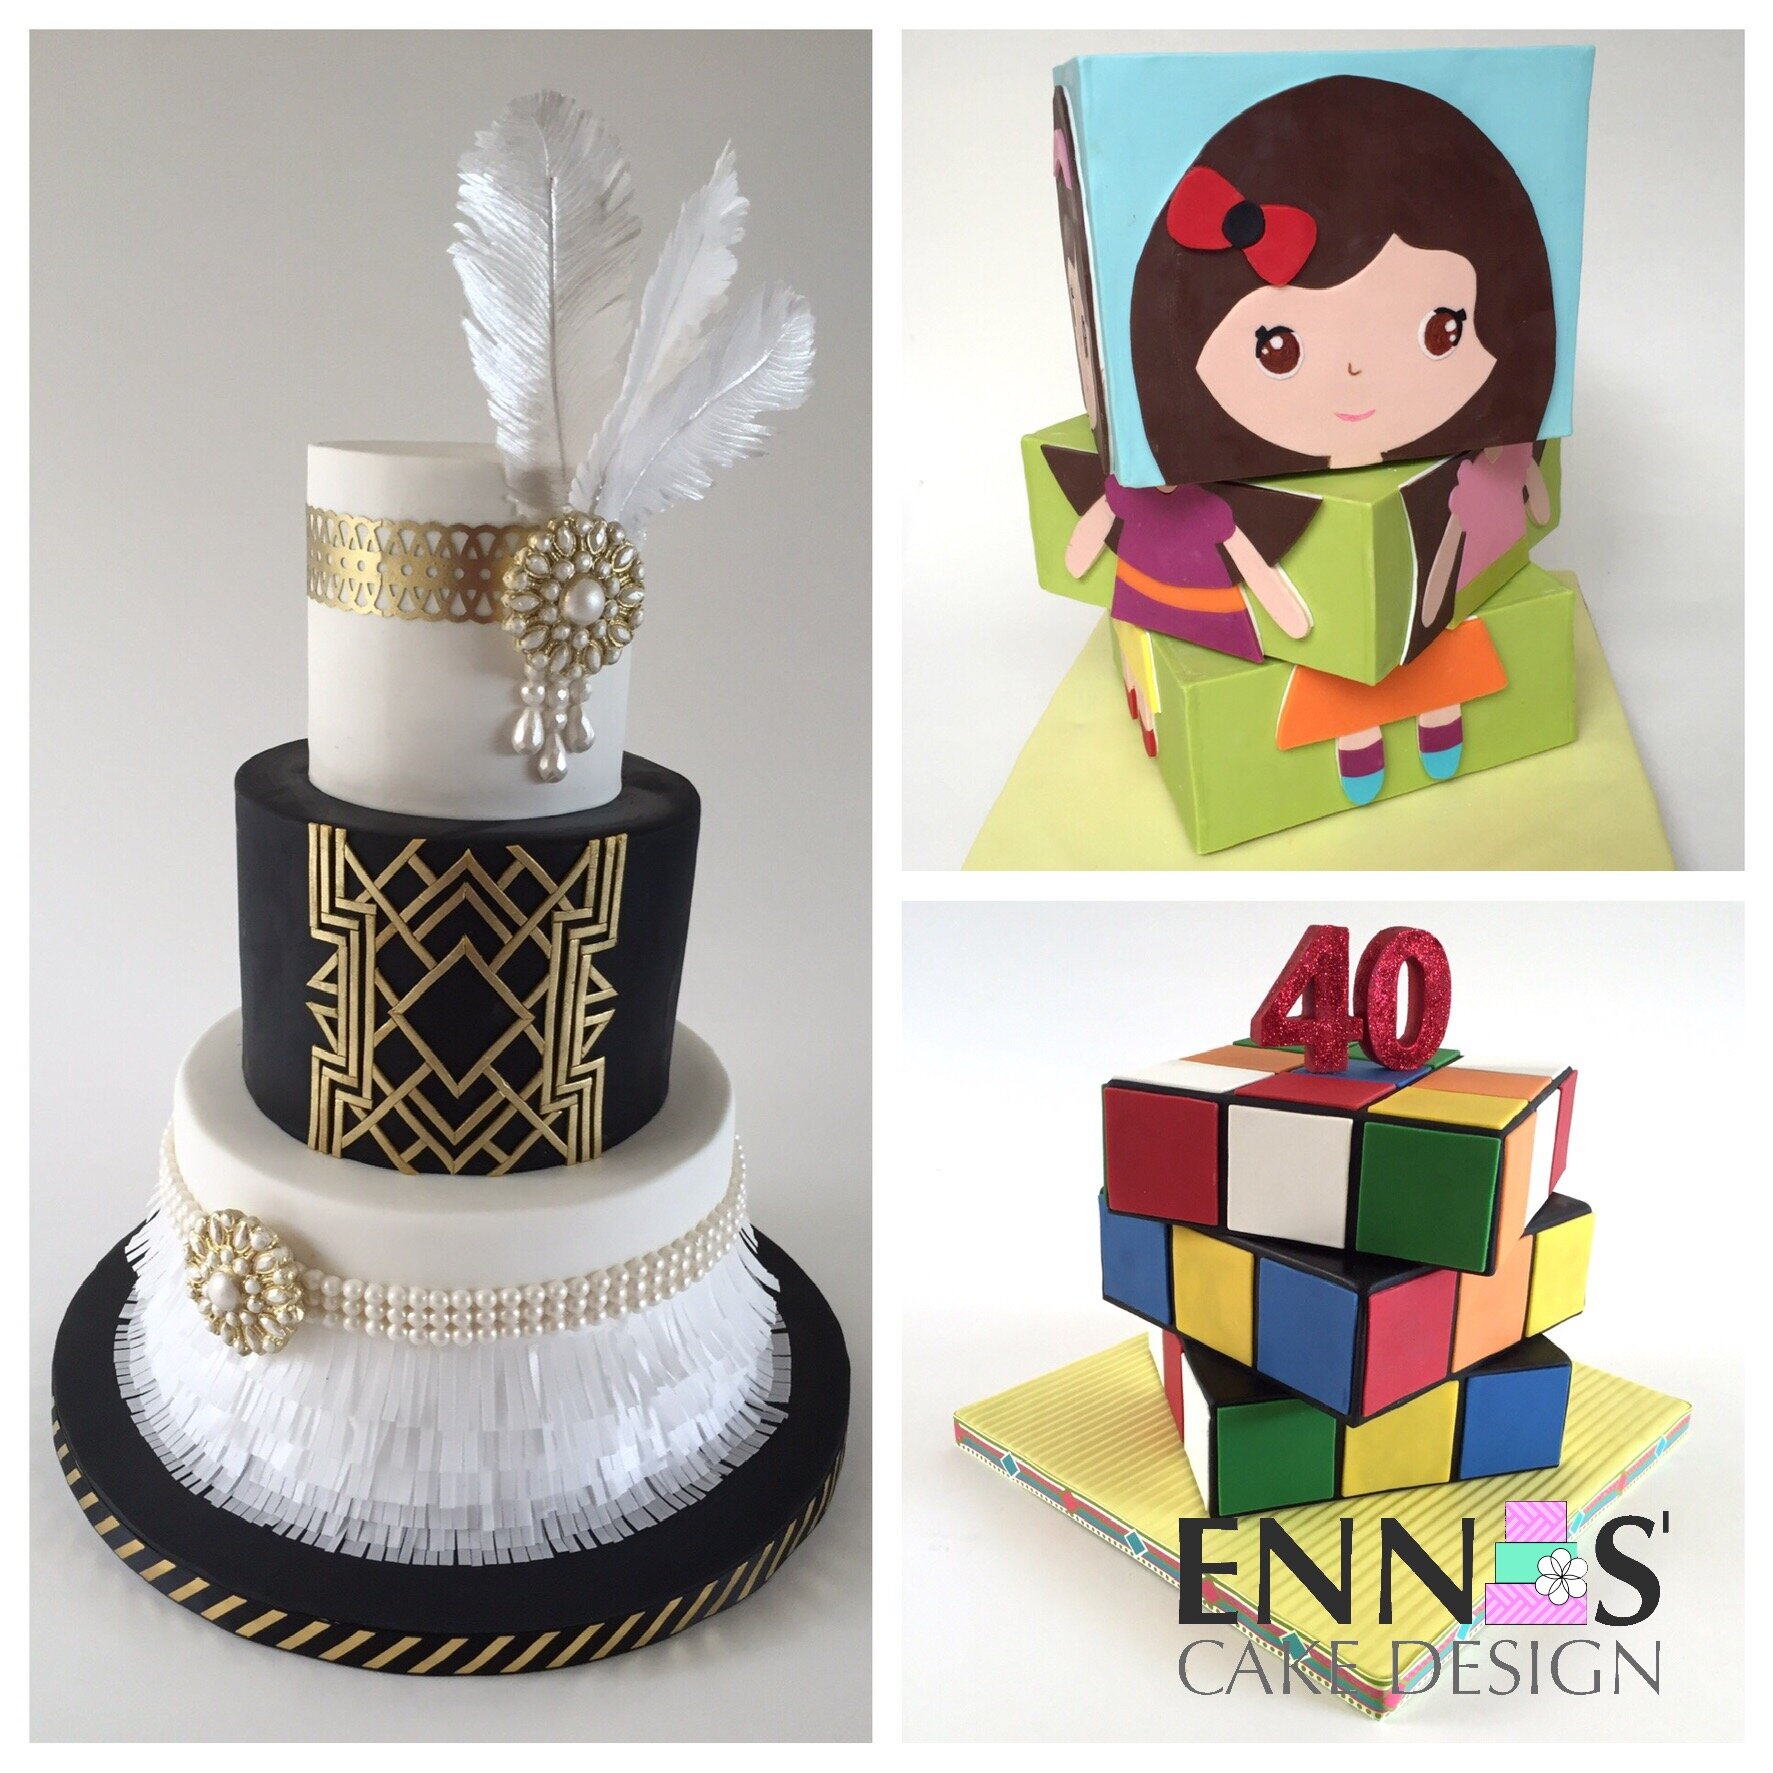
A rotating cake is lots of fun to have in your party, but it's also fun to make and easy too. You can learn to make your own rotating cake with the simple technique I teach in my new video tutorial. Once you master the technique it's all up to your creativity. You can use the lovely dolls provided in the tutorial or you can feature your favorite characters from Peanuts, Star Wars, Barbie, Lego or Avengers... or you can simply mix and match faces placing eyes in the top tier, nose in the middle and mouth in the bottom tier... the possibilities are endless!

Rotating Doll Cake Tutorial

Posted
AuthorIrina Salazar
CategoriesTutorials, Cake

For my sister's 40th birthday I wanted to surprise her with a special cake, one with some of her favorite toys. That's why I decided to make her a Rubik's cube, a pocket simon, a nintendo controller and her all time favorite snoopy. 

The pocket Simon, the snoopy and the nintendo controller are modeling chocolate. I used my 2D Topper technique to make them, witch helped me achieve a very realistic look on the pocket Simon and the controller. 

I have a little secret to make the Rubik's Cube rotate, the best part is that you don't need any special equipment to make this possible. Just head over to my shop and get a copy of the tutorial, in it I'll show you how to cover and assemble your cake from start to finish, it also includes a template that will help you make your cube as realistic as possible. Use the coupon code "20off" to get a 20% discount on your purchase (Valid until July 09 2016). 

Now you can impress everyone with this moving Rubik's Cube cake.

Posted
AuthorIrina Salazar
CategoriesTutorials

Wafer Paper Rolled Roses, colored with ACP

Wafer Paper (WP) is an incredibly interesting and rather unexplored medium in cake decoration. The problem is you need to have an edible printer which I have not. So I looked all over the Internet with the hope of finding a printer free technique but I couldn't find any. Thus I decided to try on my own and see if I could come up with a cheaper way to color WP.

My first try was coloring the WP with piping gel, gel paste food color and white food color. But it didn't work because the white food color is very runny and contains water, what makes the WF too soft and not at all workable. I imagined this could happen but still I had to try.

On the second try I mixed piping gel and gel paste food color. With a paint brush I applied a thin coat of tainted piping gel on the back side of the WP, and guess what... it worked. But there's a catch... even though this works, you are left with a full page cover in piping gel, what limits it's versatility. 

I was ready to give up when, a couple of weeks ago, my dear friend Amber Adamson of Top Tier Cakes for All Occasions posted a great tutorial called 'ACP - Amber's Creamy Powder Method'. In this tutorial she makes the creamy powder by mixing petal dust and shortening which she uses to stencil her cakes --a very clever technique that she came up with, don't you think? (learn more here). Later Liz Marek from Artisan Cake Company posted about Amber's method; she was also impressed with Amber's cleverness, but most importantly she talked of how you can use the ACP to paint on fondant as if you were painting with oil paint. There it was! the answer I was looking for!... I just used ACP to color my WP and it WORKED!

Here are the steps to color your Wafer Paper:

  1. Make your ACP following Amber's instructions here.
  2. With the help of a spatula, spread a thin coat of ACP on the front of your WP (smooth side)
  3. Remove all the excess of ACP with a paper towel or a cosmetic sponge, until there's no more ACP on the WP.
  4. Use your colored WP as you normally will on any project you like.

The only potential downside is that because the WP is very porous you will end up with an uneven color. However, if you're like me you'll love the way the flowers look. You can use this technique to get a grainy texture with a lot of personality on its own. The little color specks just make the flowers pop!

Wafer Paper Rolled Roses, colored with ACP

Posted
AuthorIrina Salazar
CategoriesTutorials

2D toppers are "the cherry on the top" Ennas' Cake Design style! The idea came to me about two years ago when I made a Mario Bros. cake for my sister's baby shower. The idea then evolved from the horizontal topper you can see below to the vertical topper I'm about to show in this tutorial.

You certainly don't need to be an expert cake decorator or use special tools to make 2D toppers. The secret lies in slicing the design of your choice as a puzzle and carefully selecting what layer each elements belongs to. Once you've learned that trick you'll be ready to use this technique on whatever design you like to.

For this tutorial we are going to build a Twilight Sparkle topper. If you have a daughter, as I do, you may hear something like "mommy, are you making a cake for me?"... so be prepared for a little visitor overseeing your progress. Whether you make only a topper or also a cake for the topper to sit on top of, once you're ready I'd love to hear from you and see pictures of your projects... Ready? Let's have some fun 2D toppering!

What you need:

Step 1: Print at least 3 copies of Twilight Sparkle at the actual size you want it to be. I printed it 4" tall. (Note: for more complicated designs you may need more copies)

Step 2: Cover every copy, front and back, with packaging tape. This will protect your patterns from water or grease stains and keep them from ripping easily. This step can be skipped if you print it on card stock.

Step 4: Roll out black modeling chocolate (MC) 1/4" thick (I used two 1/4" thick balsa wood sticks to do it easily) and let it rest for about 10 min.

Step 6: With the help of a scalpel and the first pattern (see step 3) cut out the base for your 2D Topper.

Step 8: Prepare the MC colors for the all of the layers needed in the design. Roll them out using two 1/16" thick balsa wood sticks, and let them rest for 5 to 10 min before cutting your pieces.

Step 10: Carefully place the lager pieces of the puzzle first (body, tail, and head). Attach them with a bit of sugar glue or water.

Step 12: To help the tail stay attached to the body, stick a toothpick on an angle inside the black base, this will make the joint of the tail sturdier. Do this before placing the color pieces. 

Step 14: Place the eyes on the topper making sure they match the pattern before glueing them.

Step 15: With an edible marker or a paintbrush and some black food color paint the eyelashes.

Step 3: With the help of an x-acto knife or a scalpel cut out your patterns. Use one copy to cut out the whole character; this will be used to make the figure silhouette. Use the second copy to cut out every color separately (big areas inside of the outline), and the third copy to cut the details and elements that go on the second layer.   

Step 5: Cover your MC with a thin coat of shortening and stick the pattern. This way you won't need to hold the latter while cutting. Remember that too much manipulation softens the MC making it lose its shape.

Step 7: Place one toothpick on each of the legs of the pony, This will serve to place the topper on the cake.

Step 9: Using your patterns and a scalpel cut out every piece in its corresponding color. Remember to keep the pattern stuck to the MC, this will prevent the smaller pieces from losing their shape.

Step 11: Carefully remove the paper from each piece of MC after attaching it to the base.

Step 13: Making the eyes is more complicated because the pieces are smaller; it's important to double check every time you cut a piece and adjust it if necessary. These are the steps:

a. Cut the white, purple and black pieces using the patterns. b. Place the purple MC piece on top of the white and carefully cut out the white piece using the purple as your pattern. Discard the white section from under the purple piece and assemble the remainder white and the purple pieces together  c. Repeat step b using the white smaller piece to cut the black. d. To make room in the iris for the pupil repeat the step b with the black and purple pieces. e. Glue all the pieces together with some sugar glue, always checking your pattern. f. Roll a very small piece of white MC for the sparkle. g. Repeat the same process to make the left eye.

Your 2D topper is now ready!!! 

Feel free to share this tutorial with your friends if you like it and send pictures of your 2D toppers.

Leave your questions and comments in the section below. 

Posted
AuthorIrina Salazar
CategoriesTutorials